Tuesday, September 3, 2013

Quest for a Gluten Free Cake Recipe - Round 1

I needed to test some gluten free cake recipes since I am making a wedding cake for Meghan's co-worker. Why gluten free cake you ask? The bride to be has been having a series of food allergies and her doctor suspects it is to gluten. So, this brings a challenge, but something I am willing to explore so that the couple and their guests can all enjoy the wedding cake.

I have been bouncing around with making the top tier gluten free, or the entire cake and cupcakes. Either way, whatever they smash into each others faces needs to be gluten free.

So, I rounded up four recipes I scoured the Internet over - based on reviews.


Recipe # 1: Modified recipe using Bob's Red Mill vanilla cake mix as a base:

The result was not what I was hoping for. As suspected, the cake taste was OK - but you could tell it was used with rice flour. The texture was was spongy but slightly chewy and not much crumb.


Recipe # 2: Vanilla pound cake using garbanzo flour:

I chose this pound cake recipe because the pictures displayed a moist cake with a nice crumb.While the cake did in fact have the texture I wanted, I could definitely tell this was made from beans. There was no amount of vanilla that could escape this "beany" flavor.


Recipe #3: Modified Betty Crocker GF Vanilla Cake Mix recipe:

I was reluctant to try a modified cake box mix again, but this one had lots of pictures and great reviews. Betty Crocker makes a line of gluten free cake mixes. I was skeptical that this would be any good because, cake mixes usually have all kinds of preservatives in it. To my surprise, the vanilla cake mix ingredients are: Rice flour, sugar, potato starch, leavening (which baking soda and baking powder), xanthum gum, and salt. That's it! This is pretty much a standard GF flour blend - so I decided to go forward with this one.

This recipe doctors up the mix by adding extra egg and egg white, orange juice, vanilla (I used bourbon vanilla extract - amazing!), and vanilla pudding mix.

The result was a tasty cake that was moist and had a nice crumb - very close to a wheat flour cake recipe. The orange juice was not detectable (which was a concern) by my taste tester. Whoo hoo! I could definitely work with this one... perhaps even use this recipe as a template and re-create it from scratch. But! I have one more recipe to test ....


Recipe #4: Vegan and Gluten free recipe using coconut flour as a base:

As I expected, this recipe tasted OK - but coconut flour usually comes out with a grainy texture. You can prevent this by processing your flours to super fine texture and sifting before mixing to bake. Some people also pre-soak their flours.

I did not do either or these extra steps, because the recipe and reviews made it seem like this would work without it. The results were not bad, but not what I was looking for. It was moist, but with very little crumb. I worry that this would become extremely dense when sitting in a fridge and thawing out, since coconut flour tends to absorb lots of moisture.


The winner in this round was Recipe #3, which can be found here. The texture and taste were pretty close to wheat flour recipes - and I have some other ideas to tweak this recipe, so this will be my next baking project. But at last! I have found a base I can work with - it only. took. 7 hours.

What I learned:
  • Don't plan a day of baking without eating breakfast first. By noon and stomach was hurting from sampling batter and cake. My inner child was quite happy, though.
  • Gluten Free baking is not an easy task - thanks to all of those GF bloggers out there that helped me out on this one. The information is plentiful and there is lots of room for creativity as there are so many gluten free flour options and ingredients to use. 
  • Be more scrutinizing when I read reviews. It probably is something good to note if the reviewer actually remembers what wheat flour cake tastes like. They could rave over how delicious a GF cake is, but probably has not had wheat flour cake in over a decade. Yikes. 
  • Tests, practicing, and trial and error are all necessary. I got into some frustration over this round, but I did broaden my abilities in baking. 
  • I have a lot of GF flours left over - I don't know what to do with them yet.
  • Guar gum is cheaper and a substitute for Xanthum gum. 
  • Make sure you remember to use a paddle attachment when making butter cream - or else you end up with air bubbles when you are piping/icing. Oops.
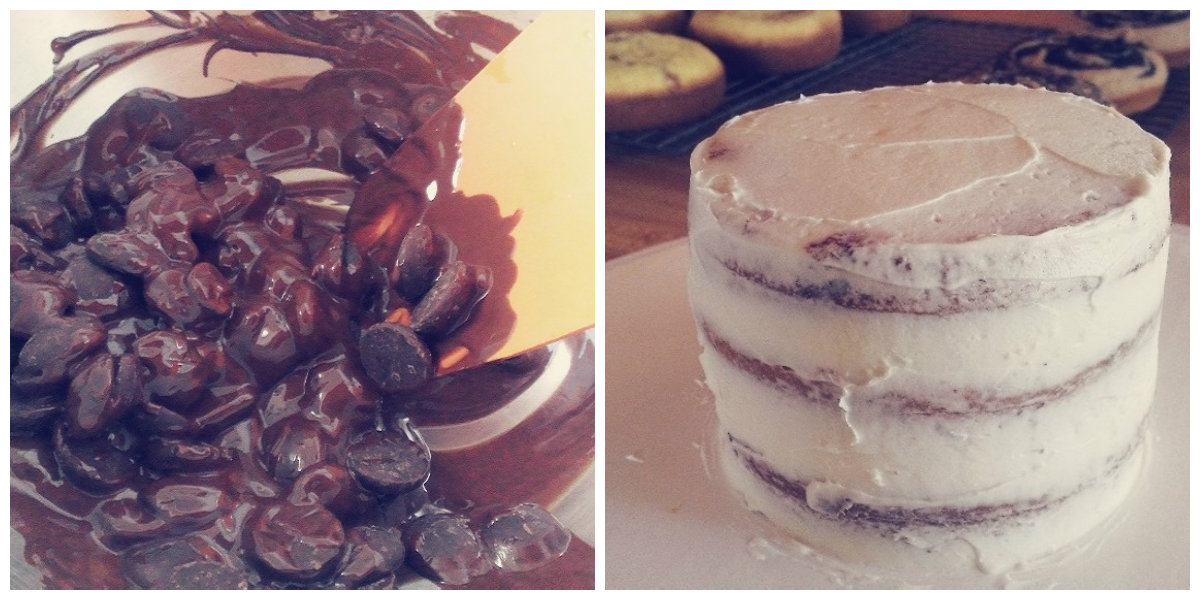

Meghan taste tested the cupcakes and gave a thumbs up - so I filled, iced, and packaged a mini cake and cupcakes for the wedding couple to sample. Hope they like it!
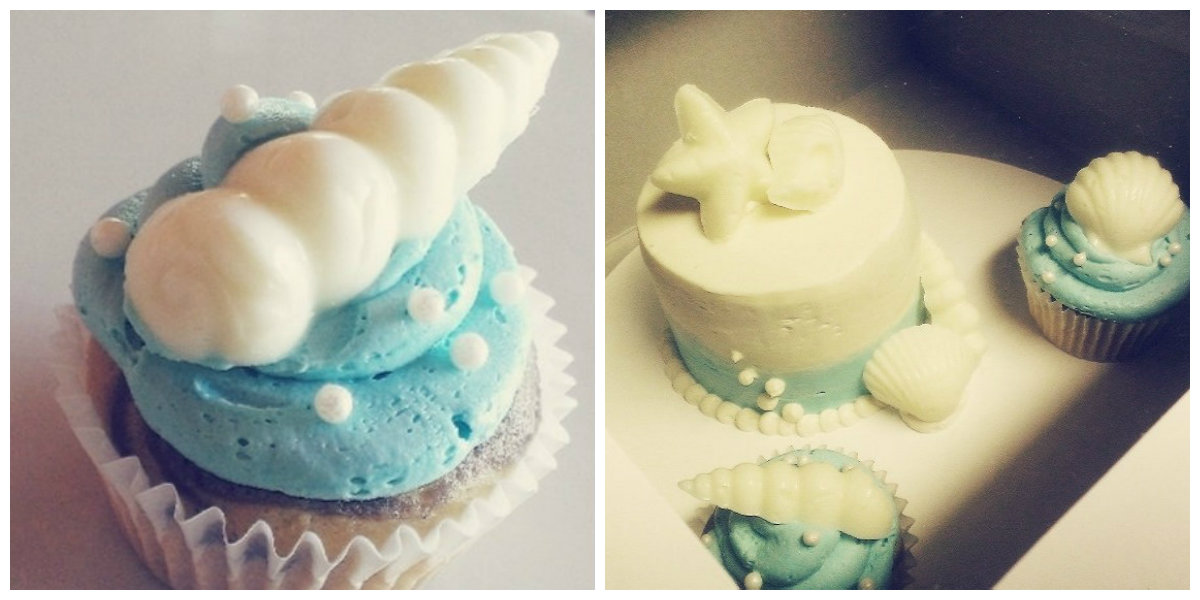
Gluten free marble cake with Bavarian cream and chocolate ganache filling, vanilla buttercream, and white chocolate seashells

**Update**
The couple liked the samples and decided to make the top tier with GF cake along with a few cupcakes for the wedding. A Gluten Free Win! I can say for sure that I will be using this recipe as a base from now on!


Monday, August 26, 2013

Dark Chocolate Tart (Vegan)

Sometimes you just want dessert, other times chocolate. In my case its usually a chocolate dessert, but I don't want to put a lot of effort to get it.

This chocolate tart is rich and just the right amount of sweet... plus it's:
  • Easy to make
  • Vegan
  • Gluten Free
  • No added sugars

I seriously had no idea it was going to taste this good. So go ahead, treat yourself - be creative with the toppings and garnishes too!

Dark Chocolate Tart
Printable Recipe


Vanilla infused figs, Fleur de Sel, Coconut "Bacon" Garnishes

Ingredients: You can go with vegan or non vegan ingredients - your preference

Crust:

1/4 cup pitted Medjool dates
1/2 cup Raw Pecans (Raw cashews, almonds, or macadamia nuts work too)
1/4 cup unsweetened shredded coconut
Tart pan - I used a 4¼” x 13¾” x 1” Rectangle Tart Pan

Instructions
  1. Lightly grease your tart pan with some coconut oil
  2. In a food processor - add in all your ingredients and pulse until well blended. You want the consistency to be so that you can easily form the "dough" with your hands without chunks of nuts crumbling out. 
  3. Press your crust into the tart pan, and little up on the sides if you have extra. Set aside.


I ended up not having extra for a side crust, because this stuff tastes like LARA bars and I kept eating it ....Oops.


Filling:

10 oz dark chocolate
1 cup almond milk
3 TBSP coconut oil
1 TSP Vanilla 
Double boiler or heat proof bowl and pot
Whisk
Measuring cup

Instructions
  1. Set up your double boiler and heat to a gentle simmer, about medium heat. 
  2. Add in your dark chocolate morsels. Whisk gently until all the chocolate is melted and smooth. 
  3. Add in vanilla into the chocolate and whisk.
  4. In your measuring cup, add in your milk and coconut oil and heat for about 1 min in the microwave. 
  5. Add in your milk/oil mixture and whisk until the mixture is smooth and creamy. remove from heat. Because it is warm, it will have a thin viscosity - don't worry - the chocolate will set in the fridge. 
  6. Pour chocolate mixture into your tart pan slowly over your crust until even. 
  7. Place in fridge and allow to set for at least 4 hrs or overnight. You can add your garnishes within about 2 hours of the tart setting and place back in the fridge
You can pop the air bubbles with a tooth pick for a smooth glossy surface.


Garnish Ideas:
Fruit compote
Fresh Fruit
Course Sea Salt or Fleur de Sel

Caramel

Bacon 
Coconut


Friday, July 26, 2013

Tres Leches Cake

Hello! It has been a long while - I have been traveling and working, with not much time to focus on anything creative. I have a few projects in line, which includes more baking/cooking and some crafts.

This past weekend was a birthday weekend, and was requested to make a Tres Leches Cake.

Since I have not been blogging for a while, I totally forgot to take step by step pictures - my bad! But here is the recipe I put together and the cake turned out delicious!

Tres Leches Cake


For the Cake:

1 box of white cake mix
5 Eggs
1/3 cup of water
1 tsp vanilla extract (optional)
Two 8 or 9 inch cake pans, lined with wax paper, and greased

I accidentally forgot the oil, but the cake turned out fine! Less fat right? You can also substitute the cake recipe for one made from scratch. I took a shortcut by using boxed cake mix, but modified it to make it more spongier.

Preheat your oven to 350 F

1. Whip the eggs together at high speed until it increases volume (almost double), and is a pale yellow color.

2. Slowly add in the cake mix and mix on med speed until  half of it is incorporated.

3. Add in water and vanilla

4. Slowly add in the rest of the cake mix until well incorporated and no lumps are visible. The batter will be medium-thick viscosity.

5. Evenly pour batter into your cake pans

6. Place in middle of the oven rack and bake 30-35 min or until knife/toothpick comes out clean.

7. Remove from oven and allow to cool completely in pans.

8. After cooled, remove from pans. You might have ended up with rounded cake tops, no worries, just even slice off with a serrated knife to even out the cake layers nice and flat.

9. Place the layers on two separate plates.

Tres Leches Syrup

1 Can sweetened condensed milk
1 Can evaporated milk 
1 cup cream or half and half
2 tsp Rum extract (or real rum!)
1 tsp vanilla extract


1. This one is easy, mix all ingredients together.

2. If you did not have to slice your cake tops, make sure you poke holes in the cake with a fork. If you did slice the cake tops, you can go ahead to step 3.

3. Take your two plates of cake, and evenly pour the Tres Leches syrup on both layers. Don't be shy! the cake will absorb all the liquid, but do this step slowly. I ran into an issue while putting the cake together, where I put too much sauce and it was dripping out while I was frosting it. You should pour enough syrup to where the cake is very moist, but excess is not pooling on the sides.

4. Place in fridge while you prepare filling and whipped cream frosting.


Whipped Cream Frosting

1 1/2 Quart Heavy whipping cream 
1/4-1/2 cup powdered sugar
2 tsp vanilla
2 tsp rum extract (optional)

1. In a cold bowl, pour in whipping cream and beat on high speed until it begins to thicken. 

2. Add in vanilla, rum extract, and a portion of your sugar and continue to mix. 

3. Continue to add powdered sugar to taste and mix until whipped cream is a thick consistency, where you have stiff peaks. 

4. If not ready to apply to cake right away, place it fridge to stay cool. 


Filling and Garnish

Fresh strawberries
Semi sweet chocolate morsels
Wax paper
Piping or ZipLoc bag 

1. Set up a double boiler with a pot of water and a heat proof bowl place over it. Make sure the bowl is not submerged in water. 

2. Allow the water to come to a medium boil, add your chocolate chip morsels to the bowl and allow to melt. Stirring frequently until the chocolate is smooth with no lumps. 

3. While waiting for the chocolate to melt, place a sheet of wax paper, and outline the size of your cake pan. Place this wax paper on a flat baking sheet (also make sure there is room in your freezer to place the baking sheet in)

4. After the chocolate is melted, transfer to your piping back and allow to cool for a few seconds. 

5. To make the chocolate garnish,  create swirls or squiggles or anything you like. I just went with constant circular motions to make one large piece of chocolate "lace". 

6. After you have finished placing your chocolate design on the wax paper, pop it in the freezer until it is completely solid, and cold enough to where when handling with you hands, the chocolate does not melt right away at room temp. 10-20 minutes. 

7. Slice up some strawberries to use for filling and top your cake with. 

Cake Assembly

1. Take your bottom layer, apply liberal dollops of whipped cream and some chopped strawberries to the center of the cake. 

2. Using a angled spatula, evenly spread the filling on the cake, add more if needed. 

3. Carefully transfer the second layer on top. 

4. Evenly add the whipped cream frosting to the cake. Pipe in a border if you like (I did with a star tip on the bottom)

5. Carefully remove your chocolate garnish from the wax paper and place on your cake (you have to work quickly and carefully! Once you put that thing down, you can't pick it up or move it, unless you take off the frosting layer and start over again with a new garnish. 

6. Top with a sliced strawberry.


I think the cake turned out very elegant and was also very delicious! It was pretty much gone by the end of the day!


Monday, May 13, 2013

The Best Chocolate Cake

This past weekend, I made a chocolate cake from a recipe I found on Epicurious. This turned out to be the best chocolate cake I have ever baked and eaten. It was right at the cusp of becoming a brownie, but still crumbly enough to be a cake. It was chocolaty and delicious, I just had to share this recipe find.

Chocolate cake with fresh whipped cream


As a request, I layered and frosted with a whipped cream filling, but I am excited to try this cake out with a ganache filling and Swiss meringue buttercream frosting as well.

Double Chocolate Layer Cake (Adapted by Epicurious)
This recipe yields two 10 inch layers, or three 8 inch layers
Printable Recipe

Chocolate Cake
  • 5 ounces fine-quality semisweet chocolate (I used Ghiradelli dark chocolate morsels)
  • 1 1/2 cups hot brewed coffee (this can be made with 1.5 cups water and a teaspoon of instant coffee)
  • 2 1/2 cups sugar
  • 2 1/2 cups all-purpose flour
  • 1 1/2 cups unsweetened cocoa powder (not Dutch process)
  • 2 teaspoons baking soda
  • 3/4 teaspoon baking powder
  • 1 1/4 teaspoons salt
  • 3 large eggs
  • 1/2 cup coconut or vegetable oil
  • 1 1/2 cups well-shaken buttermilk
  • 3/4 teaspoon vanilla

Let's Bake!
  1. Preheat oven to 300°F. and grease pans.
  2. Line bottoms with rounds of wax or parchment paper.
  3. Finely chop chocolate and in a bowl combine with hot coffee. Let mixture stand, stirring occasionally, until chocolate is melted and mixture is smooth.
  4. Into a large bowl sift together sugar, flour, cocoa powder, baking soda, baking powder, and salt. In another large bowl with an electric mixer beat eggs until thickened slightly and lemon colored (about 3 minutes with a standing mixer or 5 minutes with a hand-held mixer).
  5. Slowly add oil, buttermilk, vanilla, and melted chocolate mixture to eggs, beating until combined well. Add sugar mixture and beat on medium speed until just combined well.
  6. Divide batter between pans and bake in middle of oven until a tester inserted in center comes out clean.
  7. Bake between 1 hour - 1 hour and 10 minutes. I checked at 45 minutes, and then again at the 1 hour mark. I allowed my cakes to bake the full 70 minutes.
  8. Cool layers completely in pans on racks. Run a thin knife around edges of pans and invert layers onto racks. Carefully remove paper  lining.
  9. Cake layers may be made 1 day ahead and kept, wrapped well in plastic wrap, at room temperature.
  10. Layer cake with filling and frost with buttercream or icing

If using whipped cream, keep refrigerated and allow to sit at room temp for an hour before serving. If using buttercreams or icing, the cake can sit at room temperature without refridgerating.


Thursday, May 9, 2013

Corn Chowder with Shrimp and Bacon

  
This dish was something I had on pinned on my Pinterest board for a while, and finally decided to make it! I served this chowder with a jalapeno and parmesan corn bread, and it was so delicious!

I had to make some adaptations with what I already had on hand, and also because my dinner guest has an allergy to onions. I swapped out onions with shallots, and still used onion powder because strangely, she is not allergic to either of those.

Jalapeno Parmesan Corn Bread
Printable Recipe
  • 1 box cornbread mix
  • 1 Jalapeno, roughly chopped
  • 1/2 cup parmesan cheese, or more if you like
  1. Follow mixing and baking instructions on the box
  2. Add in jalapeno and cheese, mix well
  3. Place in a muffin pan, or small loaf pan
  4. Bake for 15-20 minutes or until golden brown. Check to see if a knife comes out clean to make sure it is done. (While the cornbread is baking, start working on the chowder)
  5. Remove from oven and allow to cool in pan
  6. Remove cornbread from pan (slice if needed) and serve.

Corn Chowder Recipe (Adapted by Bev Cooks - 2 servings)
Printable Recipe
  • 2 slices bacon, cut into 1/2-inch pieces (Heck, I cooked 6 slices of bacon)
  • 1 pound shrimp, peeled and deveined
  • 3 Shallots (you can replace with 1 onion)
  • 3 cloves garlic, minced
  • 1 TBSP smoked paprika
  • 1 TBSP Old Bay seasoning
  • 1 TBSP onion powder
  • 1 pinch crushed red pepper (I added about 1.5 teaspoons)
  • 3 cups frozen corn, thawed
  • 2 cups chicken stock
  • 1/2 cup tomato sauce (or you can use with 1/2 cup canned tomatoes, it gets pureed later on)
  • 1/2 cup half and half or cream
  • Coarse salt and freshly ground pepper
  • Avocado Slices
  1. You can season your shrimp with a little salt, pepper, and smoked paprika, set aside, but this is optional.
  2. Heat a medium-sized pot over medium heat. Add the bacon and cook until crispy. Remove bacon from the pan and set aside on a paper towel to drain. Drain all but 1Tbs. bacon fat, if you have that much in the pot.
  3. Raise the heat to medium-high. Add the shrimp to the pot and sear on one side for 2 minutes. Flip and sear 30 more seconds. Remove shrimp from pot and set aside.
  4. If you need to add a little oil (or bacon fat) to the pot, do so. Add the shallots to the pot until translucent. Add the garlic, paprika, crushed red pepper and a pinch of salt and pepper. Sauté another minute.
  5. Add the corn to the pot and toss to combine.
  6. Add the stock, cream, and tomato sauce to the pot. Stir to combine. Keep on a low simmer for 15 minutes. Taste it. Need a little salt and pepper? Add a pinch or two.
  7. If you have an immersion blender, place it in the pot and pulse it a few times until about half of the soup becomes creamy, still leaving whole kernels as well. If you don’t have an immersion blender, ladle about a cup and a half of the soup into a blender and pulse until creamy. Pour back into the pot and stir to combine.
  8. Serve chowder with the shrimp and reserved bacon crumbles.
  9. Garnish with some parmesan cheese, avocado slices, and serve with cornbread

This soup was delicious and hearty. The cornbread gave a nice kick of heat, I will definitely be making this again!

Wednesday, May 8, 2013

Salted Caramel Buttercream

I decided to doll up some leftover vanilla buttercream. Like I mentioned in my last post, I came across a jar of Fleur de Sel during a random trip to ROSS, so I instantly thought of salted caramel.

This was especially easy to make, since I already had about 2 cups leftover buttercream from my last batch. All I had to do was prepare the caramel and mix it in.


Easy Caramel Sauce:

1 cup sugar
4 TBSP water
1/2 cup heavy cream
Fleur de Sel or a flaky sea salt
Medium saucepan or small pot with lid
Whisk (for mixing in cream ONLY)

1. Pour your sugar in your pan and add water

2. On low heat, swirl your pot around until the sugar is nearly dissolved. There should be no bubbling at this point, just enough eat to help. This takes about 5 minutes

3. Yep, I said SWIRL - no spatulas, no spoons. SWIRL that pot/pan! Stirring with a utensil creates condensation and possible contamination - whatever the reason, it risks your sugar of crystallizing and no one wants that.

4. When sugar is nearly dissolve, raise the heat to medium high - allowing the sugar water mixture to bubble and boil.

5. Once it starts to boil, cover the pan with the lid for 2 minutes.

6. After 2 minutes, remove the lid, and swirl the pan frequently until the sugar turns a deep amber color. It is important to be swirling and taking the sugar on and off the heat to prevent burning.

7. Once an amber color, remove from heat, and add heavy cream slowly - this is when you can use your whisk to mix it in. Be cautious, the sugar will spatter and steam because of the the reaction with the cold cream.

8. Once your caramel is mixed, let it sit for about 2 minutes to cool down.


9. Now your caramel is ready to be mixed in with your buttercream! Add as much caramel to your taste - I added about 1 cup of caramel per 2 cups of buttercream - but you don't have to use it all.


10. Add in about a teaspoon of salt to your buttercream, mix, and taste. Add more if you want, but I don't like to add much.
Voila! Salted caramel buttercream ready to be piped onto delicious cupcakes or macarons! Or you can just eat it with a spoon, I won't judge you.

I piped them onto vanilla and dark chocolate mini cupcakes, the dark chocolate really complimented the sweet buttercream. I devoured several cupcakes before I decided I could finally share them.


Monday, May 6, 2013

Swiss Meringue Buttercream

Today's post will be focused on Swiss meringue buttercream. I have tried to make Swiss meringue buttercream a few years ago and failed miserably, afraid to ever try again.

Well, after eating several french macarons and marveling over how delicious this buttercream is, I felt that I should give it another go in trying to make some myself.

This time, I was going to do research instead of blindly following a recipe. I found that research helped A LOT. Some recipes looked complicated, while others looked very simple. I decided to go with a recipe provided by Three Little BlackBirds blog.

**Update** 

Do yourself a favor and splurge on quality butter/ingredients (Land O' Lakes is a good one). Avoid using Great Value or knock off brands - I used GV unsalted butter and my poor buttercream had a weird filmy aftertaste. 

Also, make sure your egg whites smell odorless before you use them. If they smell like eggs, it will probably taste like eggs ... yep, I ruined another batch by ignoring my senses. 

What I liked about this recipe and blog, was the troubleshooting tips. The best tip I read was on prepping your cooking tools by wiping them down with lemon juice. Lemon juice cuts through any residual grease or oils that are in your bowls, whisks, or mixer attachments. Any amount of grease will surely cause your egg whites to not whip up. Who knew?!

The second tip I loved was using pasteurized egg whites, or liquid egg whites. This made my life so much easier than having to separate several egg whites and not using the yolk right away. No waste, and no more worrying about getting eggshells in anything!

Third, is my own tip, which is to make sure you have a baking or food scale. Getting the measurements down to the grams and ounces make all the difference than having to mess around with conversions.

When mixing the buttercream, TLB's blog mentioned using a stand mixer and paddle attachment, but if you have a powerful hand mixer like my Cuisinart, it works just as well, you are just working out your arms a little more, which is a bonus, because, who doesn't want toned arms?

The only adaptation I would make for this buttercream is adding some more vanilla for my taste, otherwise it came out perfect, TWICE!


I used the Swiss meringue buttercream to frost cupcakes for a middle school girl's lacrosse party to celebrate their season. I made chocolate and vanilla. Coloring the buttercream and decorating was so much fun! I made lacrosse stick toppers out of royal icing, which was made of egg whites, powdered sugar, and vanilla. The icing was piped onto wax paper and I let it dry overnight.


All cupcake decorating and box supplies were purchased from Micheals.
I used a jumbo open star tip to pipe the buttercream.

The buttercream tasted smooth, fluffy, and sweet....but not too sweet! This weekend I scored some Fluer de Sel at ROSS, so I will be using my leftover buttercream to make a salted caramel version sometime this week.

I hope you have the same success as I have had with the TLB buttercream recipe!