Saturday, September 28, 2013

Sweet & Salty Curry Roasted Chickpeas


Crunchy, chewy, sweet, salty, curry, and healthy snack? YES. 

Ingredients:

2 cans chickpeas
1 Tbsp sea salt
3 Tbsp Coconut Oil (or Olive oil)
3 Tbsp honey/agave (or 2 Tbsp organic sugar)
2 Tbsp curry powder
2 Tsp sweet smoked paprika

Roast em Up!


1. Set oven to 350 degrees F
2. Rinse and drain chickpeas. Pat dry. 


3. Toss all ingredients together in a bowl.


4. Spread evenly on lined cookie sheet


5. Let roast for 45 minutes, checking halfway to stir them around so that they brown evenly.
6. Remove from oven, and allow to cool.


Enjoy!

Wednesday, September 25, 2013

A New KitchenAid and Baking Must Haves

I wanted to use this post to shout out from the (virtual) rooftops about the amazing gift Meghan surprised me with last week.

She got me a....


                    wait for it ............


                                          KitchenAid Stand Mixer!!!!!


No special occasion, just because. Isn't she just amazing?! 

I cried, I kicked my heels, I was so grateful, happy, and ecstatic. I felt like I was in a Mary Poppins movie, that magical feeling you had when you saw Mary Poppins pulling all that stuff out of her carpet bag. Or when the Wizard Of Oz turned into color. Or when all that magical stuff happened in Harry Potter. You get the idea.

I felt like hugging all the cats in the world. I am being a little dramatic but you understand. This is such a blessing, and even more of an inspiration to my passion for cooking and baking; there is a whole world of recipes I can try with this baby. I am over. the. moon! 

I have been eyeing a KitchenAid for years, I'm talking since 2006, every time I was ready to buy one, something else more important to do with my money came up. (Phssh ... bills, what?) 

This came just in time for the wedding cake/cupcake order that is coming up in November - I am determined and more confident that they will come out beautifully with the help of my KitchenAid. 

So here it is, in all of its tangerine orange glory. I already used it to make Meghan birthday cupcakes this past weekend, where you can find the details here.

Thank you Meghan!


I also wanted to give a shout out to a few baking staples I have converted to:

1) King Arthur Flour and Cake Enhancer. Their unbleached flour has a wonderful silky texture and does not have that chemical taste. The Cake Enhancer has noticeably made my cakes more fluffier, moist, and shelf stable. I am sold, and will be using these products for all my baking from now on. 

I have used cake flours, bleached flours, gluten free flours - but aside from gluten free, this KAF flour has given me my best results. 

You can find Kind Arthur Flour usually at Publix, Whole Foods, or Native Sun. The Cake Enhancer, though, I could only find online - but is also inexpensive - click on links below to navigate to the King Arthur Flour online store:


KAF Unbleached All-Purpose Flour
KAF Cake Enhancer


2) Having a digital scale is MUST. For baking at least. Measuring cups and spoons just don't cut it for certain recipes that require specific measurement, like Swiss meringue buttercream or French macarons. The slightest offset could cause your meringue not to fluff or stiffen, or prevent your macarons from having a nice shell or forming pretty feet; trust me, I have tried and failed. 

Currently, I use an Escali Arti 15-Pound/7-Kilogram Digital Scale in Peacock Blue. It is a bit pricey, but I received this scale for free through a rewards program at my job. Did I mention I love my job? No? Well, I LOVE my job. 


ESCALI SCALES Arti Glass Digital Scale


3) Quality Vanilla and Flavored Extracts

Quality can also = $$$. Not for this girl! I have scored brands like Nielsen-Massey (my favorite) sold at places like Williams and Sonoma - but find them at discount retail stores like HomeGoods, TJ Maxx, or ROSS. I find all kinds of gourmet ingredients for cheap. My best finds have been at the HomeGoods store - been keeping my eye out for some Mexican Vanilla. 


Good Quality Extracts


Next time you go to one of these stores, check out the food and kitchen utensil aisles - you will find edible treasures there, I swear. Or, if you are not a cheap-o like me, go ahead and click on the link above and shop till you drop!

So there you have it, a few of my secrets that aided to some baking success. I am sure I will learn tons more along the way!

Happy Baking!


Sunday, September 22, 2013

German Chocolate Cupcakes

This week was a birthday week! Meghan requested a while ago for her favorite kind of cake - German Chocolate. I, too, am a fan, mostly because I am a choco-holic, but there are all kinds of layers of flavors and delicousness going on in this cake:

"German Chocolate cake is like an almond joy and pecan pie all rolled into one confection."

German chocolate cake - despite its name, was actually created in America, named after Sam German, a chocolate maker. German introduced dark baking chocolate to be used in cakes and confections. The traditional cake was invented by a home maker in the 1950's, and is layered with a caramel coconut pecan filling and topped with chocolate frosting.

Did you know that June 11th is National German Chocolate Cake day? Who knew?!

To make the cupcakes, I used the chocolate cake recipe and Swiss meringue buttercream recipe for the  the frosting. To make chocolate Swiss meringue, just fold in 5oz. of melted chocolate into the buttercream at the end when the buttercream has come together (I used Ghiradelli brand)


To fill the cupcakes, I made that scrumptious coconut pecan frosting - courtesy of Country Living, but with some adaptations. Here is the recipe below:

Coconut Pecan Filling (Adapted from Country Living)
Printable Recipe

Ingredients:

3/4 cup of sugar
2 egg yolks
1/2 stick unsalted butter
1 tsp vanilla
1  (12oz) can evaporated milk
2 cups shredded coconut (I used sweetened)
1 1/2 cups chopped pecans

Let's Cook!


  1. In a medium saucepan, add sugar and egg yolks. Use a whisk to break up the eggs and mix well with the sugar. 
  2. Add in evaporated milk and vanilla. 
  3. Turn on your stove to medium-high heat, and stir constantly for about 5 minutes. 
  4. Add in butter and stir as it melts. 
  5. Continue to stir until the caramel mixture thickens, about another 5-10 min - reduce to medium heat if to prevent from the caramel from burning (only if your stove is very hot, everyone's is different)
  6. Once the caramel can coat the back of your spoon or drips slowly, it has thickened. 
  7. Turn off stove, remove from heat.
  8. Stir in chopped pecans and coconut, allow to cool.


To assemble the cupcakes, I used a cupcake corer to hollow out the middle, spooned in the filling, and smeared a layer on the top of the cupcake. Then I piped on that smooth and chocolaty Swiss meringue butter cream, and topped with sprinkles of Meghan's favorite colors.


Happy Birthday Meghan! 
I hope you enjoyed these cupcakes and have a great 28th year!


Saturday, September 7, 2013

Toasted Coconut Pecan Pancakes (Dairy Free)

This morning I threw together some ingredients on hand, which made a pretty yummy pancake! Crunchy toasted coconut flavor over a light and fluffy pancake. Not to mention, this recipe is dairy free and can be easily "veganized" by substituting the egg with apple sauce or an egg substitute.

Click here for Printable Recipe


Toasted coconut and pecan topping:
1/2 cup shredded coconut
1.4 cup chopped pecans

  1.  Set oven to 350 degrees. 
  2. On a cookie sheet (lined with parchment paper or foil) add your shredded coconut and chopped pecans to the sheet and place in the oven. Allow to toast for about 10 minutes. Check around 5 minutes and mix it up for even toasting.
  3. Remove from oven when coconut is amber brown color, allow to cool.

Coconut Syrup Ingredients (optional, regular maple syrup is fine too!)
1 cup Maple syrup
1 tsp coconut extract

  1. In a small sauce pan, add maple syrup and coconut extract and whisk together, allow it to heat up over medium heat (until it starts to steam). 
  2. Turn off the heat and allow to stay warm over residual heat.

Pancake Ingredients:
1 1/4 cup flour of your choice (all purpose, whole wheat, unbleached, etc.)
1/4 cup coconut milk (or you can use all coconut milk 1 and 1/ cup  and omit the almond milk)
1 cup milk (or non dairy, I used unsweetened almond milk)
1 egg
1 tsp baking powder
1 tsp baking soda
1 tsp vanilla extract
2 tbsp coconut oil (melted)
2 tbsp agave syrup 
  1. Meanwhile, mix all the pancake ingredients together - mix in the melted coconut oil last!
  2. Heat pan or griddle to medium
  3. When pan is hot enough, add an extra dollop or coconut oil  (or other cooking oil) and spread around your pan
  4. Spoon in batter onto pan, the batter will start to cook and form bubbles. Once the bubbles pop but leave "craters" in the batter, it is time to flip!
  5. Flip and allow the other side to cook (about 1-2 minutes)
  6. Stack cooked pancakes, sprinkle over your coconut topping, drizzle syrup, and add a pat of butter (vegan butter to keep this dairy free)


Tuesday, September 3, 2013

Quest for a Gluten Free Cake Recipe - Round 1

I needed to test some gluten free cake recipes since I am making a wedding cake for Meghan's co-worker. Why gluten free cake you ask? The bride to be has been having a series of food allergies and her doctor suspects it is to gluten. So, this brings a challenge, but something I am willing to explore so that the couple and their guests can all enjoy the wedding cake.

I have been bouncing around with making the top tier gluten free, or the entire cake and cupcakes. Either way, whatever they smash into each others faces needs to be gluten free.

So, I rounded up four recipes I scoured the Internet over - based on reviews.


Recipe # 1: Modified recipe using Bob's Red Mill vanilla cake mix as a base:

The result was not what I was hoping for. As suspected, the cake taste was OK - but you could tell it was used with rice flour. The texture was was spongy but slightly chewy and not much crumb.


Recipe # 2: Vanilla pound cake using garbanzo flour:

I chose this pound cake recipe because the pictures displayed a moist cake with a nice crumb.While the cake did in fact have the texture I wanted, I could definitely tell this was made from beans. There was no amount of vanilla that could escape this "beany" flavor.


Recipe #3: Modified Betty Crocker GF Vanilla Cake Mix recipe:

I was reluctant to try a modified cake box mix again, but this one had lots of pictures and great reviews. Betty Crocker makes a line of gluten free cake mixes. I was skeptical that this would be any good because, cake mixes usually have all kinds of preservatives in it. To my surprise, the vanilla cake mix ingredients are: Rice flour, sugar, potato starch, leavening (which baking soda and baking powder), xanthum gum, and salt. That's it! This is pretty much a standard GF flour blend - so I decided to go forward with this one.

This recipe doctors up the mix by adding extra egg and egg white, orange juice, vanilla (I used bourbon vanilla extract - amazing!), and vanilla pudding mix.

The result was a tasty cake that was moist and had a nice crumb - very close to a wheat flour cake recipe. The orange juice was not detectable (which was a concern) by my taste tester. Whoo hoo! I could definitely work with this one... perhaps even use this recipe as a template and re-create it from scratch. But! I have one more recipe to test ....


Recipe #4: Vegan and Gluten free recipe using coconut flour as a base:

As I expected, this recipe tasted OK - but coconut flour usually comes out with a grainy texture. You can prevent this by processing your flours to super fine texture and sifting before mixing to bake. Some people also pre-soak their flours.

I did not do either or these extra steps, because the recipe and reviews made it seem like this would work without it. The results were not bad, but not what I was looking for. It was moist, but with very little crumb. I worry that this would become extremely dense when sitting in a fridge and thawing out, since coconut flour tends to absorb lots of moisture.


The winner in this round was Recipe #3, which can be found here. The texture and taste were pretty close to wheat flour recipes - and I have some other ideas to tweak this recipe, so this will be my next baking project. But at last! I have found a base I can work with - it only. took. 7 hours.

What I learned:
  • Don't plan a day of baking without eating breakfast first. By noon and stomach was hurting from sampling batter and cake. My inner child was quite happy, though.
  • Gluten Free baking is not an easy task - thanks to all of those GF bloggers out there that helped me out on this one. The information is plentiful and there is lots of room for creativity as there are so many gluten free flour options and ingredients to use. 
  • Be more scrutinizing when I read reviews. It probably is something good to note if the reviewer actually remembers what wheat flour cake tastes like. They could rave over how delicious a GF cake is, but probably has not had wheat flour cake in over a decade. Yikes. 
  • Tests, practicing, and trial and error are all necessary. I got into some frustration over this round, but I did broaden my abilities in baking. 
  • I have a lot of GF flours left over - I don't know what to do with them yet.
  • Guar gum is cheaper and a substitute for Xanthum gum. 
  • Make sure you remember to use a paddle attachment when making butter cream - or else you end up with air bubbles when you are piping/icing. Oops.


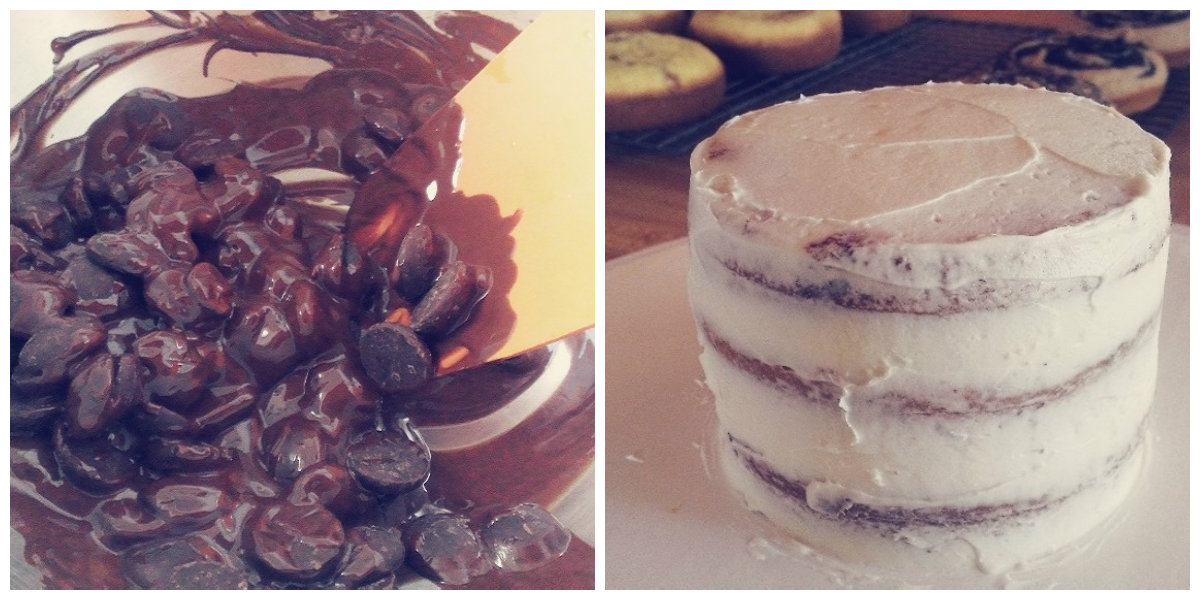
Meghan taste tested the cupcakes and gave a thumbs up - so I filled, iced, and packaged a mini cake and cupcakes for the wedding couple to sample. Hope they like it!

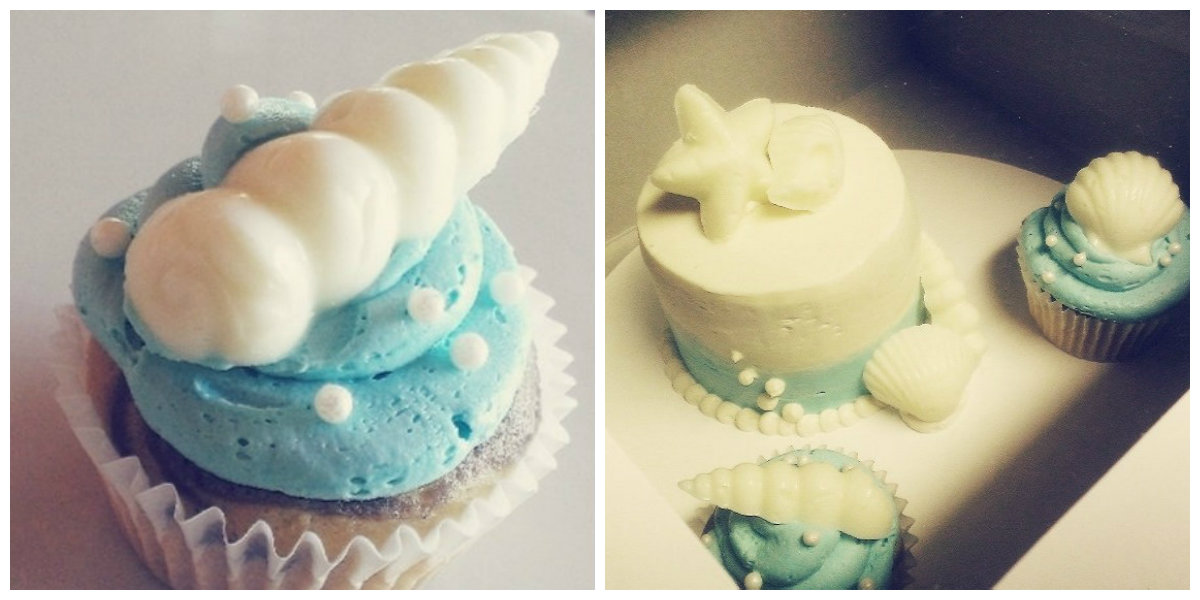
Gluten free marble cake with Bavarian cream and chocolate ganache filling, vanilla buttercream, and white chocolate seashells

**Update**
The couple liked the samples and decided to make the top tier with GF cake along with a few cupcakes for the wedding. A Gluten Free Win! I can say for sure that I will be using this recipe as a base from now on!