
 |
| Plain castella cake- YUM! |
I decided I had suffered enough, and I must learn how to make my own. I found a basic castella cake recipe here a few years ago, and have tweaked it as I went along. I crashed and burned a few times, but eventually had success
What is the big deal about this cake you say? I am probably blowing this way out of proportion, but seriously, this is my favorite cake, and everyone should experience its deliciousness, especially when it is all dressed up for a special occasion. In Korea, this is known as a sseng (fresh) cream cake.
I have made my version of these cakes for different occasions and everyone has been delighted and surprised - and I am always requested to make more. It's a sweet dessert, but not too sweet, and a nice change from heavier, rich cakes made with butter or oil.
Here are a few of my versions of the Castella/Fresh Cream Cake:
 |
| Birthday cake layered with mango mousse and topped with a strawberry gelee |
 |
| Individual cake |
 |
| Cupcake version |
So are you ready to make your own? Let's get started!
(I will update with step by step pictures when I make a new cake)
(I will update with step by step pictures when I make a new cake)
Checklist
- Stand Mixer - because it requires mixing for quite some time, and I found using a hand mixer just doesn't work as well and my cake came out dense and eggy, also my arm got tired. So if you do not have stand mixer, you better go sweet talk Grandma into letting you borrow hers.
- Flour Sifter or mesh wire strainer
- 8 eggs (this makes enough batter for two 8-9" layers)
- 1 cup, 4 TBSP of granulated sugar
- 14 TBSP all purpose flour
- 1/2 cup milk (I use full fat milk, although come to think of it, I wonder if soy or almond milk would work too...)
- 4 TBSP honey
- Cake Pan (8 or 9 inch is fine, I use square and round pans)
- Parchment Paper
- 2 Mixing bowls (Or 1 mixing bowl, and your stand mixer bowl) A metal bowl for the double boil step works best.
- 2 Small mixing bowls
- Pastry brush
- Large pot or deep pan (to double boil with)
1) Preheat oven to 340°F
2) Place pan(s) on parchment paper and trace out the shape to create a lining for your pan. Don't skip this part - because your cake will stick to the bottom.


3) Sprinkle some extra sugar on your pan (optional)
4) Fill your double boiler pot/pan with water and place on stove. bring to a boil the place on low (this will keep the heat constant)
5) Measure your flour and double sift. Set to the side
6) Crack all your eggs in a new mixing bowl, or your stand mixer bowl

7) Add sugar to the eggs

8) Whisk the sugar and eggs well, and then place the stand mixer bowl over your pan of hot water. Continue to whisk until the egg mixture feels lukewarm-warmish. When ready turn off stove that was heating the pan of water. The egg/sugar mixture should become a lighter yellow and very frothy.

9) Place your egg/sugar mixture on stand mixer with the whisk attachment. Set to med-high setting and let it mix for about 15-25 min. The batter will be ready when:
- After its almost tripled its volume
- a pale yellow color
- has a texture that can form a thick ribbon


 |
| See how pale yellow it gets? |
10) While the eggs/sugar mixture is mixing, grab your small bowl and add the milk and heat it in the microwave for about 30 sec. Add and mix honey into the milk.
11) As your batter is forming in the last 5 minutes, spoon in the milk/honey mixture into the batter.

12) Add in your flour a little at a time until all pockets of flour are gone. After the batter has been mixed, I like to fluff/stir it gently with a whisk to make sure there is no flour that settle to the bottom of the bowl.


13) Pour batter into the pans 3/4 of the way, or up to the top. Your preference, I usually use 3/4 if I am making two layers.

14) Bake for about 15-20 minutes. I like to check at the 15 min mark. The cake will be ready when:
- Top is a golden/amber brown color
- Stick a skewer, or knife in the cake and it comes out clean.

15) Once finished baking, remove from oven and set on stove or cake rack to cool.
16) While the cake is cooling, prepare a honey water mixture with 2 TBSP honey, and 2 TBSP water.
17) Immediately brush the honey water mixture over the top of the cake.
18) Once cake cool enough to touch (still warm though), remove from the pan, and wrap with layers of plastic wrap and place into a plastic bag. Seal the bag securely, and place in the fridge for a few hours or overnight This step allows the condensation create from the warm cake and honey water mixture to create its moist texture. However, If you are making the cake the same day, you can just allow to cool completely on the racks.
19) Once cooled, or if in the fridge, remove and cut as desired, or prepare to decorate the cake.
Whipped topping:


- 2 cartons of whipping cream (better to have extra)
- Triple sec (optional)
- Vanilla fruit puree, or flavor extract of your choice)
- Whip it! or gelatin to allow whipped cream to remain set (I tried both, I think I like the gelatin better)
- Powdered Sugar (to taste, I use about 1/4 cup)
- Food coloring (optional)
I like to place my stand mixing bowl in the freezer long before I do this step, so its nice and cold to whip the cream
1) Pour cream in stand mixer, and start mixing med-high speed
2) Add sugar, and flavoring
3) once soft peaks start to form, add in the whip it or gelatin
4) Once hard peaks have formed, stop, you know you have whipped it too much if it gets lumpy.
5) Layer and ice your cake with the whipped cream. Get fancy and pipe on designs if you want.
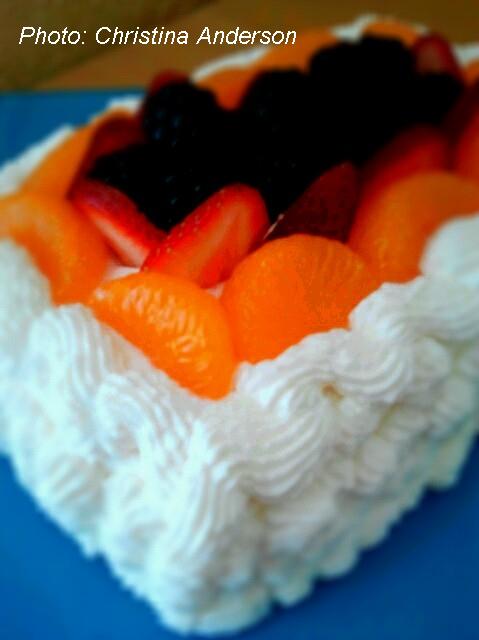
6) Top with slice fresh fruit (Strawberries, mandarin oranges, kiwi, peaches, pineapple...etc)
Make sure you keep this cake covered and refrigerated so it can stay moist and the whipped cream doesn't liquify. I found that letting it stand at room temp for 30-45 min before serving is fine. Store leftovers immediatley in the fridge.
 |
| Here is a cake I taught my sister how to make. She filled it with pineapple and whipped cream, and I helped her pipe with 1M and Rose decorative tips. Cute! |
Let me know if you tried to make this! I would love to see your version. I hope you enjoy this cake as much as I do!
No comments:
Post a Comment